Texture Routines
In addition to the default TexGen modes that are supplied
by OpenGL, the tubing library also contains some of its
own automatic texture coordinate generation routines.
This is needed in order to be able to draw a texture that
'sticks' to the extruded surface. The GLE library supplies
12 different texture mapping modes; in addition, user-defined
texture coord generation routines can be supplied. (See
the pipeline documentation for details).
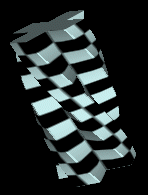
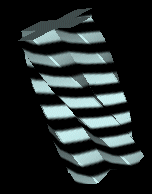
GLE needs to specify these many routines, since no one method
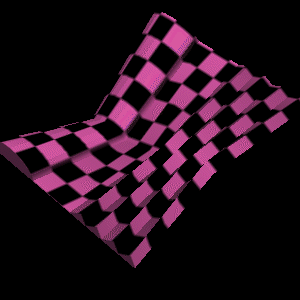
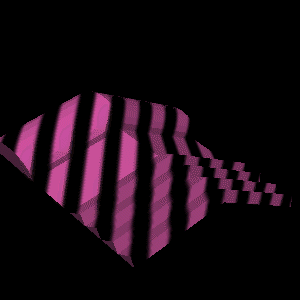
is appropriate for all shapes. The 'flat' texture modes
are appropriate for flat, open surfaces. The 'cylinder'
texture modes are appropriate for long spaghetti shapes.
The 'sphere' modes are appropriate for ball-like surfaces
of revolution. Use the 'vertex' versions of these routines
if your surface is nearly isometric (i.e. when the distances
between the points in the contour are roughly equal to the
distances between these same points in final 3D shape.)
Use the 'normal' versions of these routines when changes in
the normal vector are a better indicator of the distance between
points on the surface. (In the case of a cylinder, one
should expect that 'vertex' and 'normal' texturing yield
the same results.) The 'model' modes will in general
pin the texture onto the surface, and so the surface
wiggles, it will look like the texture is painted on.
The non-model modes will use real-space coordinates,
and so the texture may fit better on static, fixed shapes;
however, if the shape wiggles, then the texture
will squirm around on the surface.
You'll need to pick an appropriate mode for your
shape. If you're clever, then define your own. (and send me
patches if possible).
To use GLE texture mapping with the extrusion library, one must
remember to "do the obvious":
- Enable texture mapping through OpenGL
- Define and load (lmdef/lmbind) a texture
- If you enable gleTextures, then disable glTexgGen
gleTextureMode(int mode); /* bitwise OR of flags */
- This routine can be used to set the type of automatic
texture coordinate generation to be used. The argument
should be a bitwise-OR of any of the following flags:
- GLE_TEXTURE_ENABLE
- If this bit is set, then texturing is enabled. If this
bit is NOT set, then automatic texture coordinate generation
is disabled.
The way in which the automatic texture coordinate generation
occurs is determined by one of the following flags. One and
only one of these should be selected at a time. These tokens
are enumerants, not bit-flags.
- GLE_TEXTURE_VERTEX_FLAT
- Uses the vertexes "x" coordinate as the texture "u"
coordinate, and the accumulated segment length as the "v"
coordinate.
- GLE_TEXTURE_NORMAL_FLAT
- Uses the normal vector's "x" coordinate as the texture "u"
coordinate, and the accumulated segment length as the "v"
coordinate.
- GLE_TEXTURE_VERTEX_CYL
- Uses u = phi/(2*pi) = arctan (vy/vx)/(2*pi) as the texture "u"
coordinate, and the accumulated segment length as the "v"
coordinate.
In the above equation, "vx" and "vy" stand for
the vertex's x and y coordinates.
- GLE_TEXTURE_NORMAL_CYL
- Uses u = phi/(2*pi) = arctan (ny/nx)/(2*pi) as the texture "u"
coordinate, and the accumulated segment length as the "v"
coordinate. In the above equation, "nx" and "ny" stand for
the normal's x and y coordinates.
- GLE_TEXTURE_VERTEX_SPH
- Uses u = phi/(2*pi) = arctan (vy/vx)/(2*pi) as the texture "u"
coordinate, and v = theta/pi = (1.0 - arccos(vz))/pi as the
texture "v" coordinate.
In the above equation, "vx","vy" and "vz" stand for
the vertex's x, y and z coordinates.
- GLE_TEXTURE_NORMAL_SPH
- Uses u = phi/(2*pi) = arctan (ny/nx)/(2*pi) as the texture "u"
coordinate, and v = theta/pi = (1.0 - arccos(nz))/pi as the
texture "v" coordinate.
In the above equation, "nx","ny" and "nz" stand for
the normal's x, y and z coordinates.
- GLE_TEXTURE_VERTEX_MODEL_FLAT
- GLE_TEXTURE_NORMAL_MODEL_FLAT
- GLE_TEXTURE_VERTEX_MODEL_CYL
- GLE_TEXTURE_NORMAL_MODEL_CYL
- GLE_TEXTURE_VERTEX_MODEL_SPH
- GLE_TEXTURE_NORMAL_MODEL_SPH
- These define texture mapping modes that are very similar to
those described above, except that the untransformed vertices
and/or normals are used. As a result, textures tends to stick
to the extrusion according to the extrusions local surface
coordinates rather than according to real-space coordinates.
This will in general provide the correct style of texture
mapping when affine transforms are being applied to the
contour, since the coordinates used are those prior to the affine
transform.
How it Works
To best understand how to use the above functions, it is
best to understand how the tubing is actually drawn.
Let us start by defining some terms. The tubing library
"extrudes" a "contour" along a "path". The contour is a 2D
polyline. The path is a 3D polyline. We use the word
"segment" to refer to a straight-line segment of the path
polyline. We also interchangeably use the word "segment"
to stand for the section of the extrusion that lies along a
path segment.
The tubing library draws segments one at a time. It uses
glPushmatrix() and glPopmatrix() to orient each segment along
the negative z-axis. The segment starts at z=0 and ends at
some negative z-value (equal to the length of the segment).
The segment is then drawn by calling glVertex3f() (and
glNormal3F()) by drawing the 2D contour at z=0 and again at
z=-len. (Of course, if the join style is one of the fancy
ones, then the end-points are trimmed in a variety of ways,
and do not land exactly on z=0, or z=-len, but they do come
close). Note that glBegin() and glEnd() are called around
each segment. (Note also that additional glBegins/Ends may
be called to draw end-caps or filleting triangles for the
more complex join styles.)
The obvious way to automatically generate textures is to
warp the glVertex() and glNormal() functions, and compute
texture coordinates based on the 3-space vertex and normal
coordinates. This is essentially what the tubing code does,
except that it passes some extra parameters. The glBegin
calls are wrapped, and the integer segment number and the
floating-point length of the segment are passed in. By
knowing the segment number, and the segment length, the
texture coordinates can be adjusted. Knowing the length
allows the length to be accumulated, so that a texture is
applied lengthwise along the extrusion. It is this
accumulated length that is used in the FLAT and CYL mapping
modes.
For each vertex, not only are the vertex x,y,z coordinates
available, but so is a contour vertex counter indicating
which contour vertex this corresponds to. There is also a
flag indicating whether the vertex corresponds to a front or
back vertex (i.e. a z=0 or z=-len vertex). Again, this
info can be used to avoid confusion when drawing the more
complex join styles.
Hints, Tips and Techniques
- Hint: Confused? RUN THE DEMOS! The best way to understand
what all the different texture modes are doing is to see
them in action.
- Hint: The texture matrix can be used to your advantage!
That is, you can use glMatrixMode(GL_TEXTURE) to control
how textures are mapped to the surface.
In particular, you may/will want to use it to to rescale
the V coordinate.
- The origin of the contour will in general change the
vertex x's and
y's, thus changing the texture coordinates.
- The contour "up" vector will NOT influence the
texture coordinates.
- For the FLAT and CYL modes, the accumulated length
really is the accumulated length of the segments in
modeling coordinates. Unless the extrusion is very
small, this length will probably be much larger than 1.0,
and so the resulting texture coordinate will wrap.
You will generally want to rescale the "V" coordinate
to make the texture map fit.
- If the texture is "swimming" around on the surface in an
undesired way, try using the "MODEL" version of the
texture generation flag.
- Typically, you will NOT want to use the "SPH" versions of
the texture generation engine unless you really, really
have an extrusion for which spherical coordinates are
appropriate. Most uses of extrusions are best
handled with the "FLAT" and "CYL" generation methods.
- User-defined texture generation callbacks are not
currently implemented, but these should be very, very easy
to hack in as desired. It should be easy to let your
imagination run wild in here. Look at texgen.c -- what
needs to be done should be obvious, I hope. When in doubt,
experiment.

The End
Version 2.2.1 -- clean up texture documentation.